

Do This for the Best Landscape Picture Layout, Guaranteed
- Bonnie Langenfeld from Landscapes in Fabric
- Mar 31, 2025
- 2 min read


I've created so many fabric landscapes that they looked like they were assembled during a tornado! And let's not even talk about the ones where the edges were so shy they decided to hide behind the mat or frame—it's like they were playing a game of "how to be incognito" at an art gallery. Seriously, if fabric landscapes had feelings, mine would probably be in therapy right now!
However, I persisted and devised a straightforward solution for those scenarios. Keep in mind, 'simple' is my favorite approach to handling everything!
Tip #1 - Start at the End
Get a mat that you will use to frame your picture. Lay it over your image as you add elements and rearrange it. Do this often during your planning process. It will help you create a focal point, assure that no elements are lone stragglers, and you won't waste time adding something that won't even show under the mat.
Tip #2 - Use a Large Piece of Stabilizer
Cut the stabilizer at least as big as the outside edges of the mat.
Build the fabric background large enough to reach the stabilizer edges.
This allows you to move the mat around to find the perfect placement on the background.
Tip #3 - Rearrange Small Fabric Elements
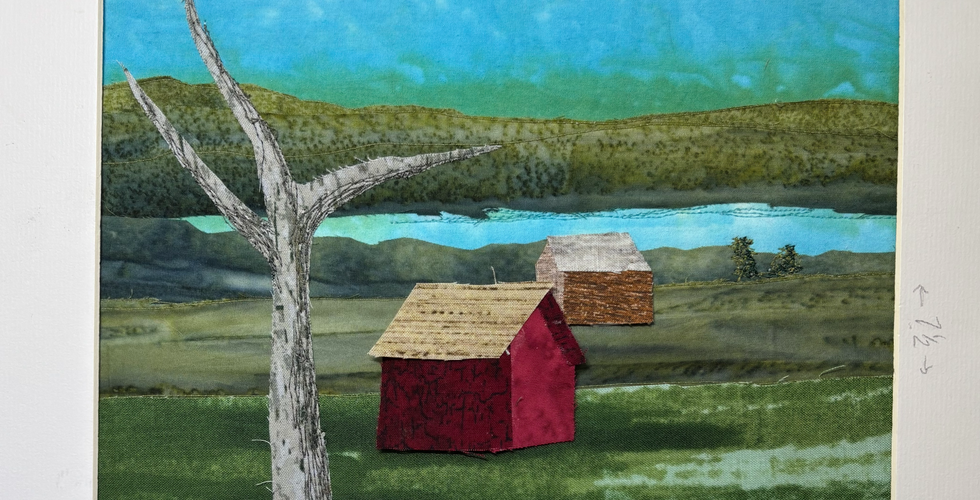
Experiment by positioning your fabric house, tree, road, or even hills and water features in different locations. I enjoy doing this to create overlapping elements, alter perspective, and demonstrate relative size.
Tip #4 - Don't have a mat handy?
Take a large piece of paper to create your own. You can either cut out the center to match the size of your mat, OR cut 8 strips of paper approximately 2 inches wide and 6-8 inches long. Position 2 strips at a 90-degree angle on each corner of your picture. Adjust the strips to determine the placements as you prefer.
Tip #5 - Finish strong
Positioning your composition within a mat opening will enhance your image and allow each element to be showcased at its finest.
If you like simple and effective, use a mat first!
Designing your image to fit within a mat opening will streamline your placement choices, save you time, and result in a beautifully finished composition.
Did you find some images in the slideshow that weren't quite right? Good! Did you find a few that had the values for the light direction mixed up? Good! You're developing the artist's eye!


Hi Bonnie! Your tip for using a Art Mat to not spend too much effort in the margins was so helpful and what a time saver!!!